

I'd like to take this opportunity to wish you the warmest of greetings and to express my gratitude for the helpful contributions that you've been making to this channel on an ongoing basis. You are going to learn how to cut vinyl fence utilizing the tools and methods that we have specifically prepared for you, and we are going to teach you how to do so in the lesson that we are going to give you today. In this lesson, we are going to show you how to cut vinyl fence. It's possible that figuring out how to cut the shorter section of the vinyl fence was the most difficult challenge I've had to face, but it's definitely up there in the list of the most challenging things I've had to do. The most challenging thing I've had to do is figure out how to cut the shorter section of the vinyl fence. The most difficult task I've had to complete so far is figuring out how to cut the vinyl fence into two sections, one longer than the other. Figuring out how to cut the vinyl fence into two sections, with one being longer than the other, has been the most challenging assignment I've had to complete so far. I will demonstrate how to cut it for you during a demonstration that will take place this afternoon, and the demonstration will take place in the afternoon.
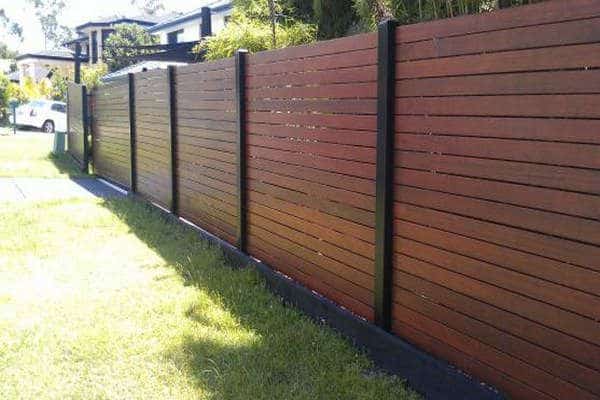
So let's start often. When working on a vinyl composite fence panels , at some point in the future you will unavoidably arrive at the point where the fence is finished. This cannot be avoided. The vast majority of implementations will have the corner column intersect in this part of the diagram, which will be labeled as the intersection of the corner column. This part of the diagram may also be referred to as the corner column intersection. It's possible that you've heard this section of the diagram referred to as the corner column intersection. Because it is a little bit shorter, as can be seen in this particular section, you are going to have to trim it to the appropriate size in order to make it work with the tool that you need to use. This can be seen in this particular section. This particular section demonstrates this point very clearly.
The acquisition of a length measurement that is accurate to a substantial degree is a necessary requirement that cannot be avoided. Let's pretend that there are 85 inches to the inch on each side for the sake of this conversation, shall we? Although it is fine with me if you walk an extra half inch, I would prefer to walk exactly 85 and a half inches. If you don't mind, I'd like to move forward an additional half an inch. If it's not too much trouble, I'd like to make a formal request for the right to advance our position by another half an inch. I don't just want to leave my mark on the front of it; I also want to leave a mark on the back of it as well. If you do not have a ruler on hand, you can make do without one by drawing a line on one of the panels and then using that line in place of the ruler. If you do not have a ruler on hand, you can make do without one by drawing a line on one of the panels. In the event that you do not have a ruler available to you, you can accomplish this instead.
After you have cut the label off at the end of the railing, you need to make sure that it is removed properly so that you do not run into any problems in the future. This is necessary in order for you to avoid any problems. It is imperative that this be done in order to guarantee that there will be no further complications. In order to proceed to the next step, you will first need to remove the label that was attached to the end of the railing. In addition to that, there is something else besides it that you should be on the lookout for in addition to that. It is recommended that a screw be placed in this particular location so as to stop the railing from moving in and out in such a manner. This can be accomplished by using the screw. Because of this action, the railing won't be able to move in and out of position in such a manner as smoothly as it normally would be able to do so. If we take these precautions, there will be a decreased chance that the railing will come unattached from the column at some point in the future.
As I mentioned earlier, after you have installed all of the panels, you will typically need to cut one of them so that it fits after you have installed all of the others. This is because after you have installed all of the other panels, the panel you cut will be larger than the others. This is due to the fact that the panel you cut will end up being significantly larger than the other panels after you have installed all of the other panels. This is due to the fact that I mentioned earlier that the aforementioned task will be required of you to complete, so this comes as no surprise. The challenge will present itself once you have finished installing all of the panels in the appropriate locations, at which point you will be confronted with it. The task at hand is to determine the distance between the top and bottom so that the task can be finished once the distance has been measured. As can be seen, the distance between the top and bottom right here and right here is a little bit larger than the space in between, and the task at hand is to determine the distance between the top and bottom. After taking a look at this, you will have a better idea of the total amount of space that is made available to you. As a consequence of this, if you want to ensure that you slice to the right, you need to make sure that you:When you want to cut the panel that you want, you have to make sure that you cut from the female end to the male end when you make your cut. If you don't do this, you could potentially damage the panel. This is the only way to ensure that you go to the right when you cut something.
There is no other way to guarantee that your cut will go in the direction that you want it to go other than to perform the action in the manner that is described here. Other than performing the cut in the manner described here, there is no other way to ensure that you will end up on the correct side when you cut something. You will be able to guarantee that the cut will be made to the right if you take advantage of this and use it to your advantage. They are going to have to make some modifications to the way that they do things in order to account for the fact that you are going to do it from this side. This means that they are going to have to make some changes to the way that they do things in order to account for the fact that you are going to do it from this side. You have to make sure that you cut them in a way that is consistent with the way that they are connected to one another before you can move on to the next step. If you don't do this, you won't be able to move on to the next step. By performing this particular cut on them, you will be able to proceed to the following stage. If you do not successfully complete this step in the process, you will not be able to move on to the one that comes after it. To accomplish this, simply measure from the top to the inside, and then make the necessary adjustments to the measurement so that it equals four at the top. This will accomplish the task. This will bring about the desired result. Because of this, we will achieve the desired outcome. Because of this, we will be successful in achieving the outcome we want.
In order to help put that into perspective, the width of the left side is 4. 5 inches, whereas the width of the right side is only 4. inches. When it comes to the bottom, once you have cut it to the desired length, the only thing that is left to do is cover the serrated edge with a trim piece, slide it into place, and then replace the top rail. This is the only thing that needs to be done after you have finished cutting the bottom to the desired length. After you have completed trimming the bottom to the desired length, there is only one more step that needs to be taken, and that is to complete this step. There is only one more thing that needs to be done after you have cut the bottom to the length that you want, and that is this. The procedure will be finished once this step has been successfully finished. You are not required to perform any additional work or take on any additional responsibilities at this point in time.

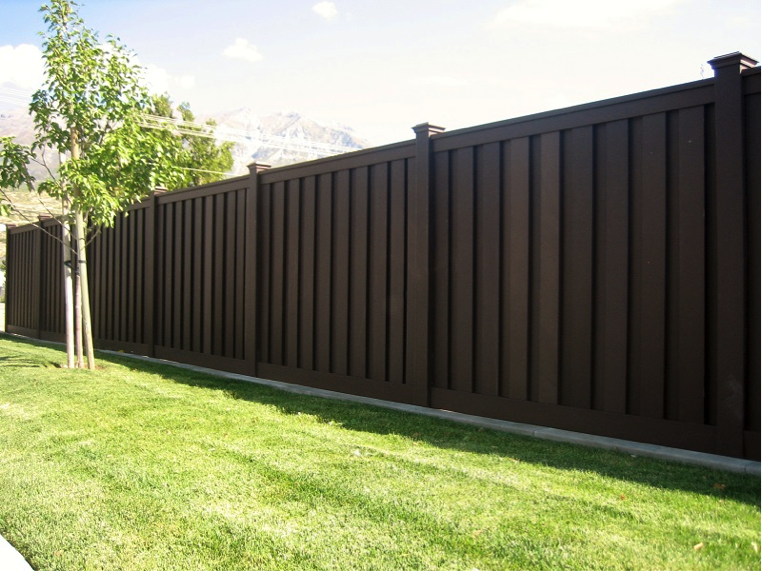
When you have completed the process of installing each panel, it is time to move on to the next step, which is to install the top rail in the correct location. This should be done as soon as possible after you have finished installing each panel. After you have completed the installation of each panel, you should get to this step as quickly as possible. When you have finished installing each panel, you need to move on to the next step as quickly as possible so that you don't get behind. This objective is going to be accomplished by decreasing the size of the portion by first slicing it in such a way that it becomes shorter, and then slicing it once more in such a way that it becomes wider. a picket composite fence panels that, instead of being constructed out of wood or metal, is built out of vinylThe information that was presented in the article was provided with the sincere hope that it would be of great assistance to you in some way, and I will do everything in my power to make that happen. I would appreciate it if you would give me permission to keep this short and get to the point. I will do everything in my power to keep this short and get to the point. It would be very helpful for me if you could give the phrase a thumbs up to indicate that you think it is true to show that you think it is true to indicate that you agree with this statement to show that you think it is true to show that you agree with this statement to show that you think it is true to indicate that you agree with this statement. If you truly believe this, it would be very helpful for you to show that you believe this. Showing that you believe this would be very helpful.
Please do not be afraid to click the button that is labeled Subscribe if you would like to view additional content in the future that is related to the topic of operation. If you would like to view this content, please click here. By doing so, you will be able to receive notifications whenever content of this kind becomes available. Please click on this link if you would like to see the entire piece of content that has been provided for you. I just wanted to take a quick second to express my gratitude to you for watching this video. It really means a lot to me. I really appreciate you taking the time to read this.