

Step 1: Preparing for Installation
Before you begin the installation process, it is essential to prepare adequately. Ensure you have all the necessary tools and materials at hand. This includes the new stator, a set of wrenches, lubricants, cleaning solvents, and personal protective equipment (PPE). Clear the work area of any debris and make sure it is well-lit. At Mingjiepump, we recommend creating a clean and organized workspace to facilitate a smooth installation process.
Step 2: Disconnecting the Pump from the System
To install the new stator, you must first disconnect the progressive cavity pump from the system. Begin by shutting off the power supply to the pump to ensure safety. Next, close any valves and relieve the pressure from the pump and connected piping. Carefully disconnect the inlet and outlet pipes, and drain any remaining fluid from the pump. Following these safety measures will prevent accidents and damage to the equipment.
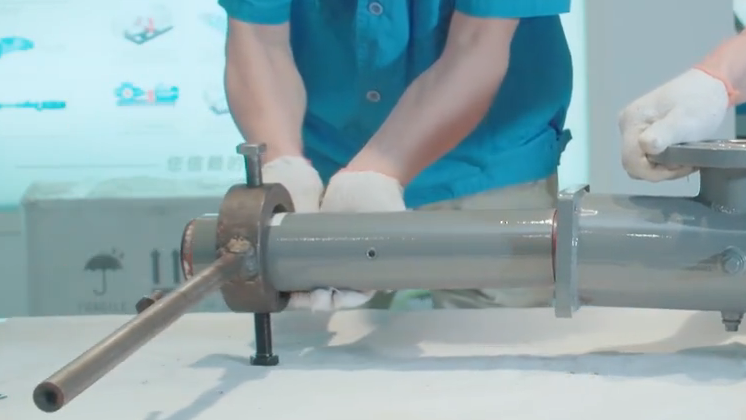
Step 3: Removing the Old Stator
With the pump disconnected, you can now remove the old stator. Start by loosening and removing the bolts that secure the stator to the pump housing. Gently slide the stator out of the housing, taking care not to damage the rotor or other components. If the stator is stuck, apply a suitable lubricant and use a soft mallet to gently tap it free. At Mingjiepump, we advise inspecting the rotor for wear or damage during this step and replacing it if necessary.
Step 4: Cleaning the Pump Housing and Rotor
Before installing the new stator, thoroughly clean the pump housing and rotor. Use a cleaning solvent to remove any residue, rust, or debris from the housing. Ensure the rotor is free of any buildup or contaminants. Proper cleaning is crucial for a secure fit and optimal performance of the new stator. Take your time during this step to ensure all surfaces are spotless and ready for the new installation.
Step 5: Inspecting the New Stator
Before installation, inspect the new stator for any defects or damage. Check the inner surface for smoothness and ensure there are no visible cracks or irregularities. Verify that the dimensions of the new stator match the specifications of your pump. At Mingjiepump, we guarantee the highest quality standards, but it is always good practice to perform a final inspection before proceeding with the installation.
Step 6: Applying Lubricant to the Stator and Rotor
To facilitate the installation and reduce friction during operation, apply a generous amount of lubricant to both the inner surface of the stator and the rotor. Use a lubricant that is compatible with the materials of the stator and the fluid being pumped. Proper lubrication ensures a smooth installation process and helps prevent premature wear. At Mingjiepump, we recommend using high-quality, pump-compatible lubricants for the best results.
Step 7: Installing the New Stator
Carefully slide the new stator onto the rotor, aligning it with the pump housing. Ensure the stator is seated properly and aligned with the bolt holes. Secure the stator to the housing with the bolts, tightening them evenly to avoid distortion. Use a torque wrench to tighten the bolts to the manufacturer's specified torque. Proper alignment and secure fastening are crucial for the stator's performance and longevity.
Step 8: Reconnecting the Pump to the System
Once the new stator is installed, reconnect the pump to the system. Reattach the inlet and outlet pipes, ensuring all connections are tight and secure. Open the valves and restore the system pressure. Check for any Blockedword/sentences and tighten connections as necessary. Reconnect the power supply to the pump and ensure all safety devices are in place. At Mingjiepump, we emphasize the importance of thorough checks to ensure a safe and reliable operation.
Step 9: Testing the Pump
With the pump reconnected, it is time to test the installation. Start the pump and observe its operation. Check for any unusual noises, vibrations, or Blockedword/sentences. Monitor the pump's performance parameters, such as flow rate and pressure, to ensure they meet the specified requirements. At Mingjiepump, we recommend running the pump under normal operating conditions for a sufficient period to validate the installation.
Step 10: Routine Maintenance and Inspection
After the installation, it is essential to establish a routine maintenance and inspection schedule. Regularly check the pump for signs of wear, Blockedword/sentences, and performance issues. Maintain proper lubrication levels and clean the pump components as needed. Scheduled maintenance helps extend the life of the stator and the entire pump system. At Mingjiepump, we offer maintenance tips and support to help you keep your progressive cavity pump in optimal condition.
Installing a progressive cavity pump stator is a detailed process that requires careful preparation, precision, and attention to detail. By following this comprehensive guide, you can ensure a successful installation that maximizes the efficiency and lifespan of your pump. At Mingjiepump, we are committed to providing high-quality products and expert guidance to support your pumping needs. Trust us for all your progressive cavity pump solutions and experience the difference that our expertise and dedication to quality can make.